 Gallery: Keeping You in the Know
Overview
Gallery is a web application where participants receive incident information.
In the Gallery user interface, there are two major functional sections:
- Gallery Wall: The dashboard that displays cards to help participants visualize the incident.
- Gallery Archive: A collection of information that contains relevant reporting, intelligence, news, and social media.
For installation, refer to these GitHub repositories.
Configuration
Configure and deploy Gallery using the Gallery Helm Chart. The Helm Chart README provides detailed instructions for all deployment settings.
Classification Banner
Gallery UI supports an optional, customizable classification banner that displays persistently at the top of the application. The banner can show classification labels (such as "UNCLASSIFIED" or "SECRET"), maintenance messages, or any other persistent notification. Configure the banner through HeaderBarSettings in the Helm chart. See the Classification Banner section of the Gallery Helm Chart README for configuration details.

Administrator Guide
Gallery administrators use the Administration View to manage collections, exhibits, users, roles, and groups.
Administration View
Across the Crucible exercise applications, the Administration View is where privileged users configure the platform and control access. It includes user and team management, role and permission assignment, and setup and maintenance of app-specific templates and content. The Administration View is where admins prepare and manage the environment so events run smoothly for participants.
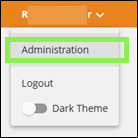
Accessing the Administration View is the same in all Crucible exercise applications: expand the dropdown next to your username in the top-right corner and select Administration.
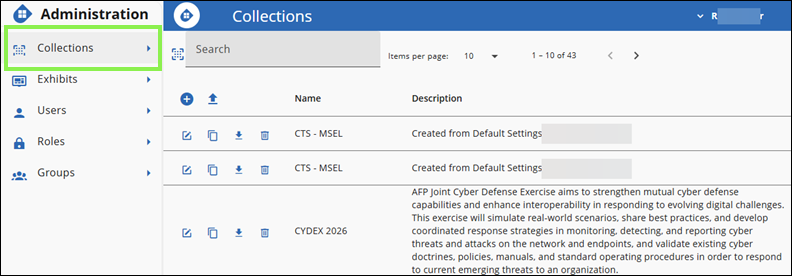
Collections
Collections are the top-level containers that group cards and articles for an exercise. The Collections page lists all available collections and provides access to their cards, articles, and memberships.
Add a Collection
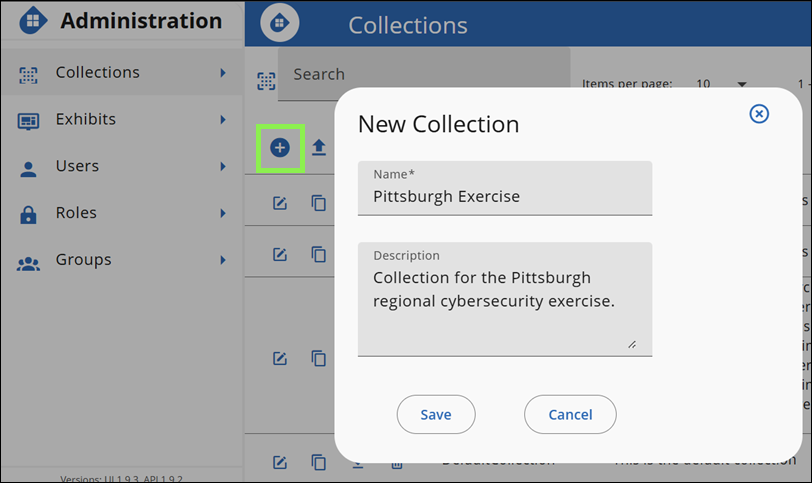
- Under the Collections Administration View, click + (Add Collection).
- In Name, enter the collection name (for example,
Demonstration). - In Description, enter a brief description (for example,
This is a collection created for demo purposes.). - Click Save.
Upload a Collection
- Click the Upload icon next to +.
- Select the collection JSON file to upload.
Edit, Copy, Download, and Delete a Collection
- Edit: Click Edit (pencil icon) next to the collection, make the desired changes, and click Save.
- Copy: Click the Copy icon next to the collection.
- Download: Click the Download icon next to the collection.
- Delete: Click the Trash Can next to the collection.
Cards
Cards group articles into categories and appear on the Gallery Wall. Configure cards within a collection.
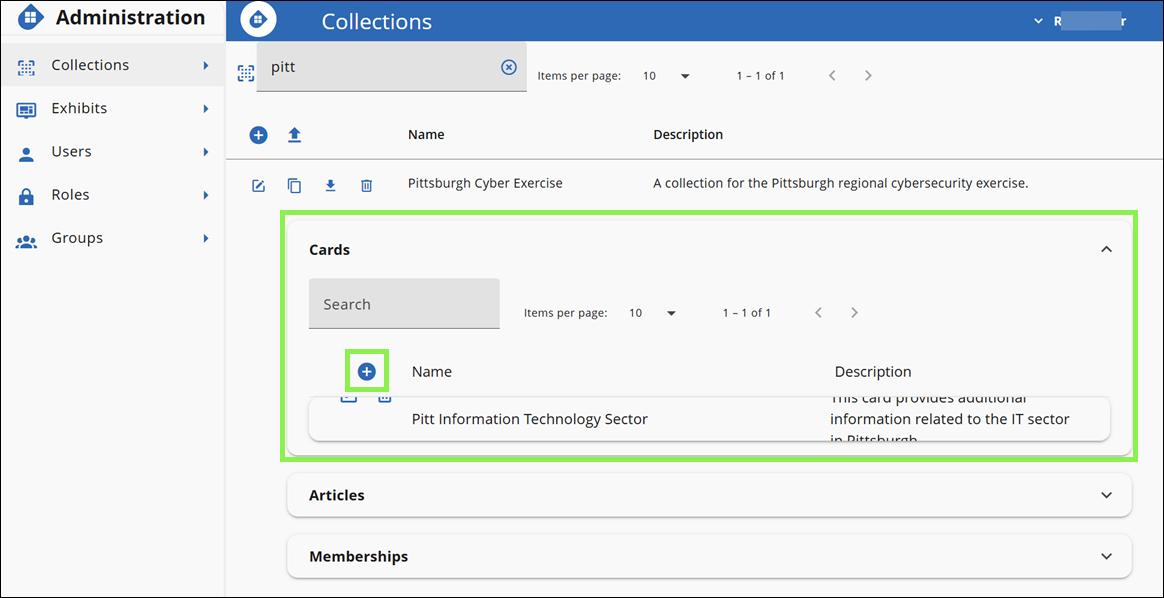
Add a Card
- Locate and select a collection.
- Expand the Cards section, click + (Add a Card).
- In Name, enter the card name (for example,
Pitt Information Technology Sector). - In Description, enter a brief description (for example,
This card provides additional information related to the IT sector in Pittsburgh.). - Click Save.
Edit and Delete a Card
- Edit: Click Edit (pencil icon) next to the card, make the desired changes, and click Save.
- Delete: Click the Trash Can next to the card.
Articles
Articles provide supplemental information from different sources. Configure articles within a collection and assign them to cards.
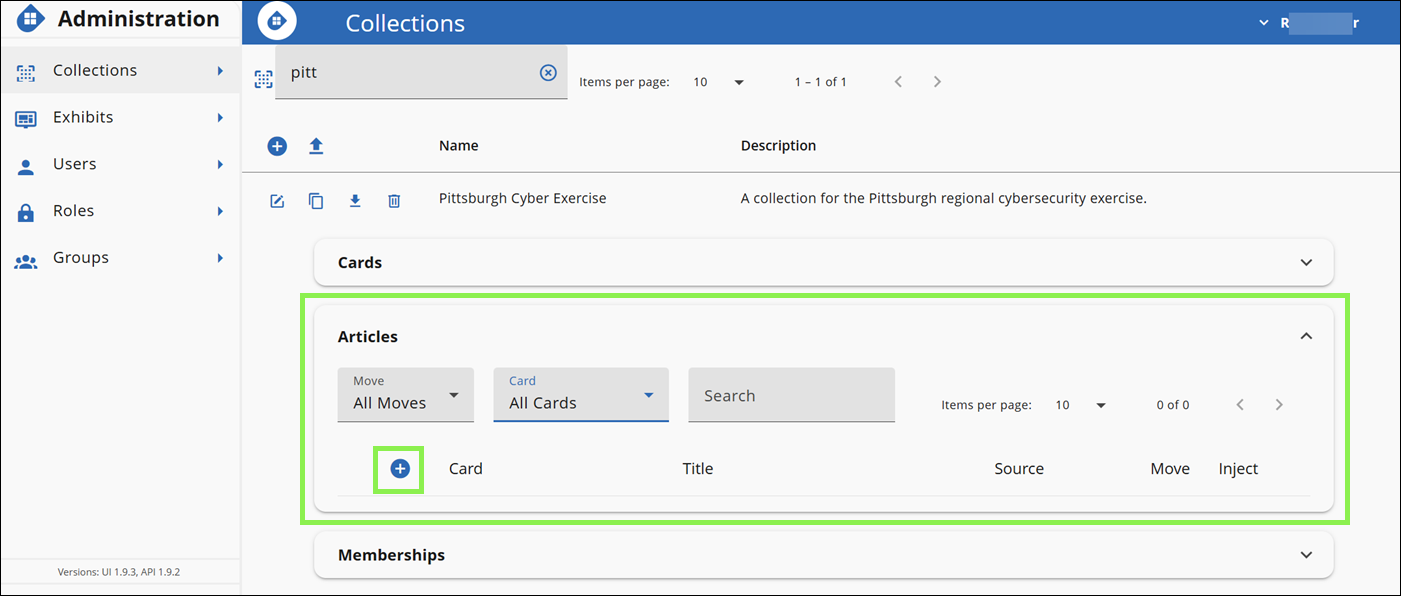
Add an Article
- Expand the Articles section, click + (Add an Article).
- In Name, enter the article name (for example,
Power outage reported in downtown Pittsburgh). - In Summary, enter a short summary (for example,
Major power outage affecting Pittsburgh's central business district). - In Description, enter the full article content.
- In Card, select the card to categorize this article (for example,
Pitt Information Technology Sector). - In Status, select the article's status (for example,
Critical). - In Source Type, select the source type (for example,
News). - In Source Name, enter the source name (for example,
Pittsburgh Post-Gazette). - In URL, enter a URL for additional information if needed.
- Select Open URL in new tab to open the URL in a new tab.
- In Move, enter the move number (for example,
1). - In Inject, enter the inject number (for example,
1). - In Posted Date / Time, enter the article's date and time (for example,
04/23/2026, 13:01:00). - Click Save.
Edit and Delete an Article
- Edit: Click Edit (pencil icon) next to the article, make the desired changes, and click Save.
- Delete: Click the Trash Can next to the article.
Memberships
Memberships control which users and groups have access to a collection and their assigned roles within it.
To add a member:
- Under Users/Groups, find the user or group and click + (Add [User Name]).
- In the Role dropdown next to the member under Members, select the desired role.
To remove a member, under Members, find the user or group and click -.
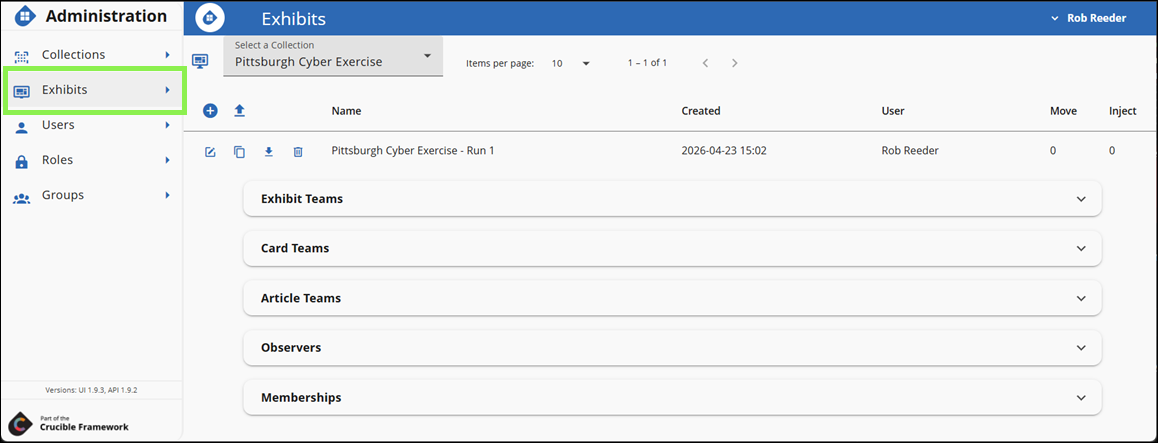
Exhibits
An exhibit is a scheduled instance of a collection. The Exhibits page lists exhibits within a selected collection and provides access to exhibit teams, card teams, article teams, observers, and memberships.
Add an Exhibit
- Under the Exhibit Administration View, click + (Add Exhibit).
- In Name, enter the exhibit name (for example,
Pittsburgh Cyber Exercise - Run 1). - In Description, enter a brief description (for example,
First run of the Pittsburgh Cyber Exercise.). - In Current Move, enter the starting move number (for example,
0). - In Current Inject, enter the starting inject number (for example,
0). - Optionally, in Scenario ID, enter the Steamfitter Scenario ID to link this exhibit to a Steamfitter scenario (for example,
7b3f9e2a-1c4d-4e8f-a5b6-d2c1e3f4a7b8). - Click Save.
Note
The system automatically generates the ID. If you leave Scenario ID blank, the system generates one automatically.
Upload an Exhibit
- Click the Upload icon next to + (Add Exhibit).
- Select the exhibit JSON file to upload.
Note
When you add a new exhibit, the system creates a new collection with the uploaded exhibit. To view the uploaded exhibit, navigate to the collection using the dropdown and select the collection with the same name as the file you uploaded.
Edit, Copy, Download, and Delete an Exhibit
- Edit: Click Edit (pencil icon) next to the exhibit, make the desired changes, and click Save.
- Copy: Click the Copy icon next to the exhibit.
- Download: Click the Download icon next to the exhibit.
- Delete: Click the Trash Can next to the exhibit.
Exhibit Teams
Exhibit Teams are the teams that participate in an exhibit.
To add a team to an exhibit:
- Under the Exhibit Teams section, click + (Add Team).
- In Name, enter the full team name (for example,
Pittsburgh Cyber Team). - In Short Name, enter a short name or acronym (for example,
PCT). - In Email, enter the team's email address (for example,
pct@pittsburgh.gov). - Click Save.
To configure a team:
- Click the team row to expand its configuration.
- Under All Users, click + next to a user to add them to the team.
- Under Team Users, check the Observer box to assign the Observer role to a user.
- Under Team Users, click - next to a user to remove them from the team.
Card Teams
Card Teams assign Gallery cards to exhibit teams.
To add a card team:
- Under the Card Teams section, click + (Add Team).
- In Team, select the team (for example,
Pittsburgh Cyber Team). - In Card, select the card to assign (for example,
Pitt Information Technology Sector). - In Move, enter the move number (for example,
1). - In Inject, enter the inject number (for example,
0). - To show the card on the Gallery Wall for the team, select Is Shown On Wall.
- Select Can Post New Articles to allow the team to add new articles to this card.
- Click Save.
Article Teams
Article Teams assign articles to exhibit teams.
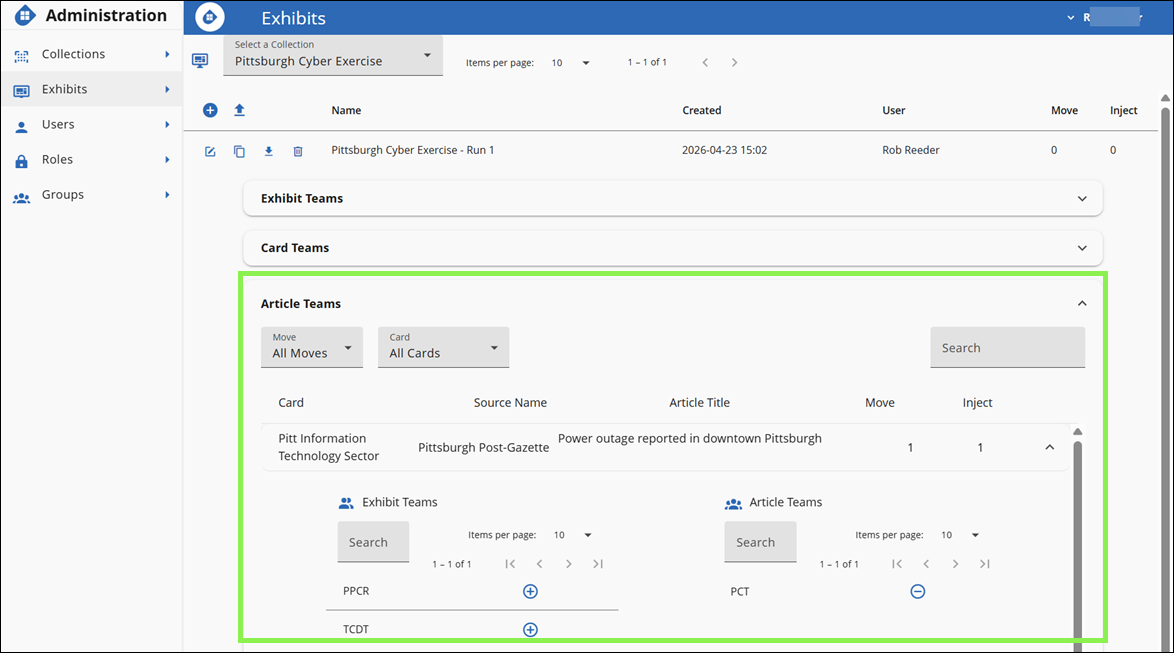
To add a team to an article:
- Click the article row to expand its team assignment.
- Under Exhibit Teams, click + (Add team) next to a team to assign them to the article.
- Under Article Teams, click - (Remove team) next to a team to remove the assignment.
Observers
Observers can monitor all teams during an exercise.
To assign the Observer role to a user, under Exhibit Users, find the user and click +.
To remove the Observer role, under Observers, find the user and click -.
Note
You can also assign the Observer role from the Exhibit Teams section by checking the Observer box next to a user in the Team Users panel.
Memberships
Memberships control which users and groups have access to an exhibit and their assigned roles within it.
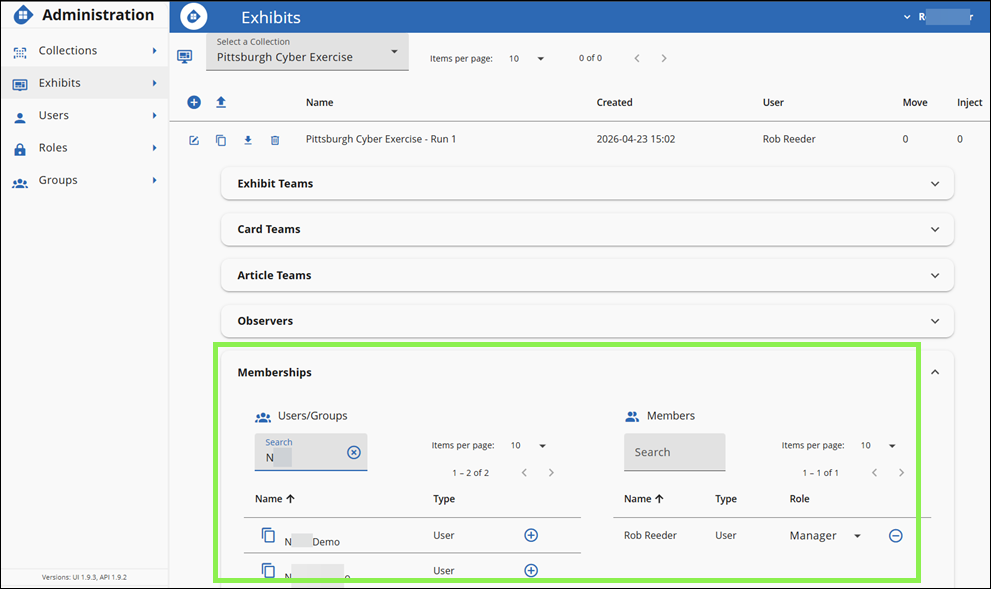
To add a member:
- Under Users/Groups, find the user or group and click + (Add [User Name]).
- In the Role dropdown next to the member under Members, select the desired role.
To remove a member, under Members, find the user or group and click -.
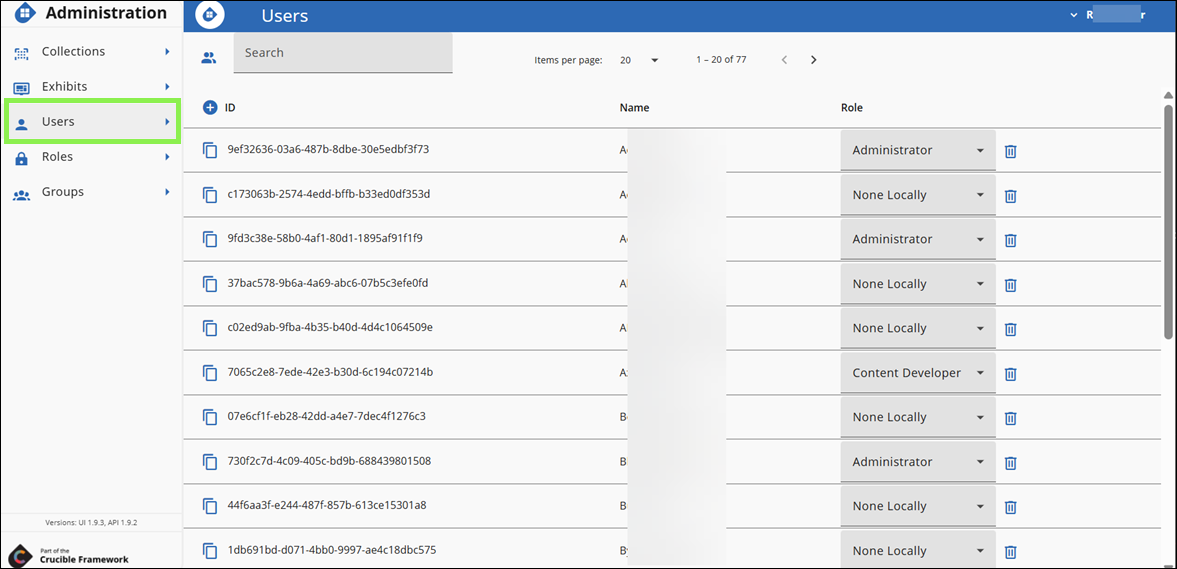
Users
The Users page lists all Gallery users and their assigned roles.
The available roles are:
- None Locally: No Gallery-specific permissions assigned.
- Administrator: Full administration privileges across all Gallery pages.
- Content Developer: Can create collections and exhibits, and view roles and groups.
- Observer: Can view collections, exhibits, users, roles, and groups.
Most users won't have any role assigned in this application.
Add a User
Users with the Manage Users permission can add users. To add a user, follow these steps:
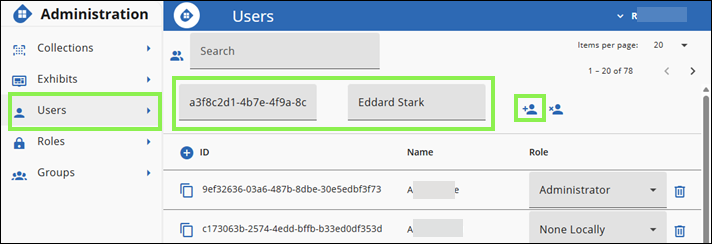
- Under the Users Administration View, click + (Add User).
- In User ID, enter the user's GUID (for example,
a3f8c2d1-4b7e-4f9a-8c33-2e1f6b5a9d0c). - In User Name, enter the user's name (for example,
Eddard Stark). - Click Add this user.
- In the Role dropdown next to the user, select the appropriate role.
Change a User's Role
In the Role dropdown next to the user, select the desired role.
Delete a User
To delete a user, click the Trash Can next to the user.
Roles
The Roles page defines the permissions for application-level roles and collection and exhibit-specific roles. Gallery has three role scopes: Roles (application-wide), Collection Roles, and Exhibit Roles.
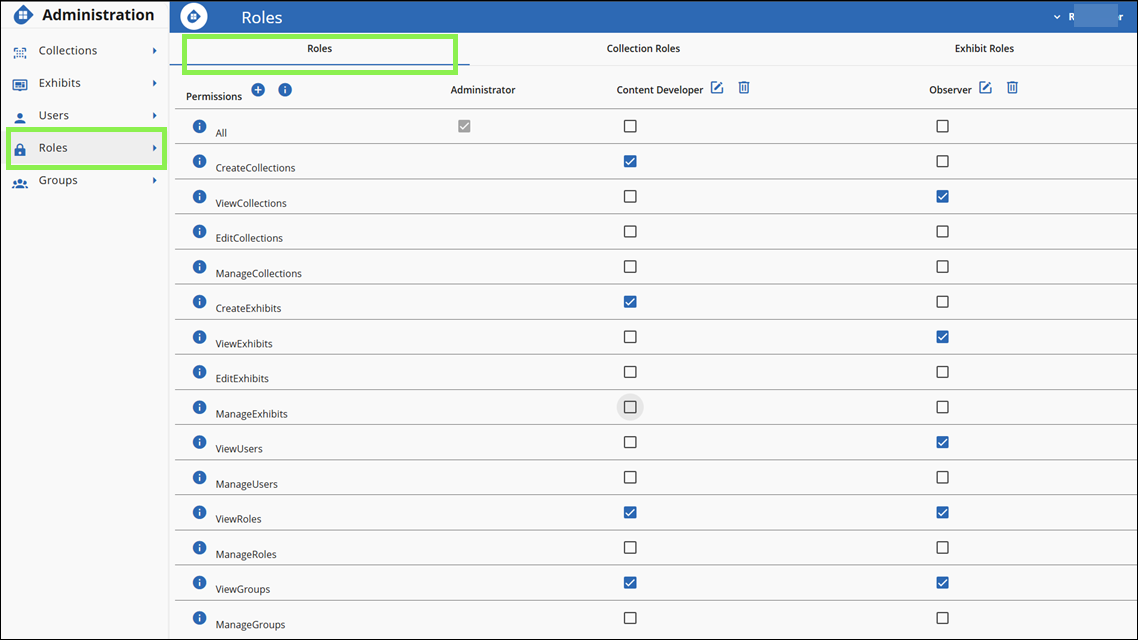
Roles
The Roles tab defines application-wide roles and their permissions. Gallery has three application-wide roles:
- Administrator: Has all permissions.
- Content Developer: Can create collections and exhibits, and view roles and groups.
- Observer: Can view collections, exhibits, users, roles, and groups.
Administrators can add custom roles using + and edit or delete existing roles using the pencil and trash can icons.
Collection Roles
Collection Roles control what users can do within a specific collection. The available collection roles are:
- Manager: Full access to the collection.
- Member: Can view and edit the collection.
- Observer: Can view the collection.
Exhibit Roles
Exhibit Roles control what users can do within a specific exhibit. The available exhibit roles are:
- Manager: Full access to the exhibit.
- Member: Can view and edit the exhibit.
- Observer: Can view the exhibit.
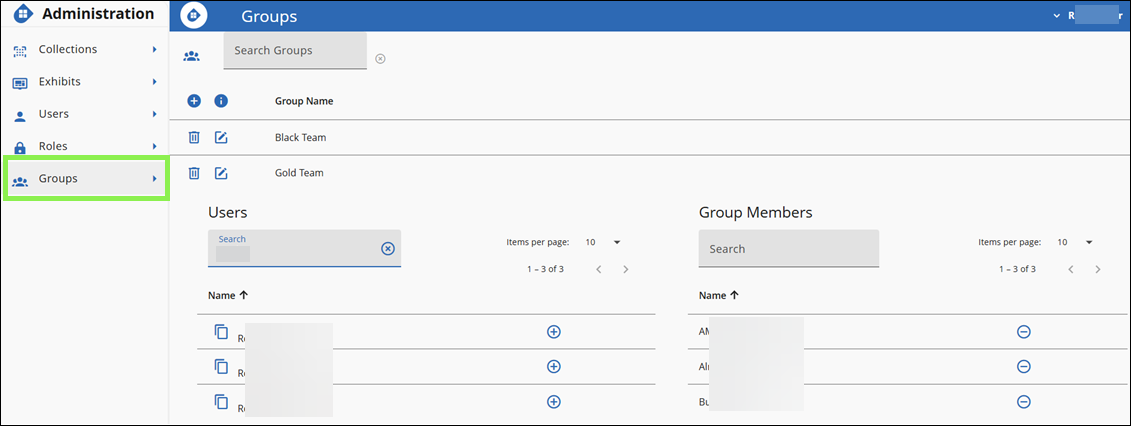
Groups
Groups allow administrators to organize users for easier management.
Add a Group
- Click + (Add New Group).
- In Name, enter the group name.
- Click Save.
Edit and Delete a Group
- Edit: Click Edit (pencil icon) next to the group, make the desired changes, and click Save.
- Delete: Click the Trash Can next to the group.
Add and Remove Users in a Group
To add a user to a group:
- Click the group row to expand its configuration.
- Under Users, find the user and click +.
To remove a user from a group, under Group Members, find the user and click -.
User Guide
Participants use the Gallery Wall and Archive to track and respond to exercise events.
Gallery Landing Page
The Gallery landing page displays the exhibits the user is a participant in.
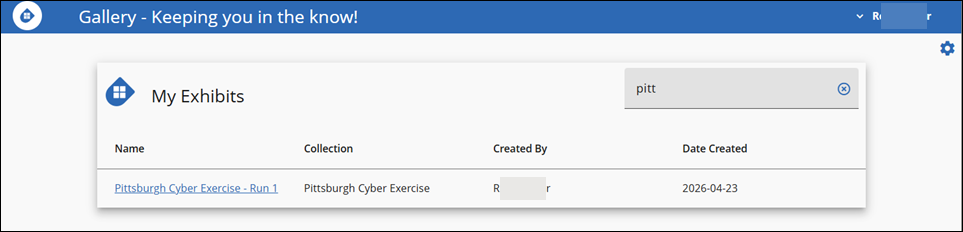
Search for an Exhibit
To search for an exhibit, follow these steps:
- Navigate to Gallery's landing page.
- In the Search field, enter the name of the exhibit.
Gallery Wall
The Gallery Wall displays cards with color-coded status indicators:
- Red: Indicates a closed status.
- Orange: Indicates a critical status.
- Yellow: Indicates an affected status.
- Green: Indicates an open status.
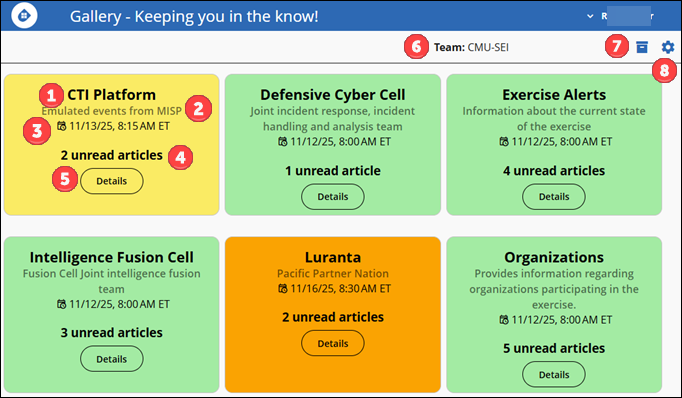
- Title: The title of the card.
- Description: A brief description of the event.
- Date Posted: The date and time the card was last updated.
- Unread Articles: The number of unread articles on the card.
- Details: Opens additional details and filtered articles for the card.
- Team: Displays the currently selected team. Users who are also observers can use this to switch between teams and view other teams' progress during the exercise.
- Wall and Archive Toggle: Toggles between the Gallery Wall and Gallery Archive.
- Gear: Opens the Administration View. See Administration View.
Gallery Archive
The Gallery Archive is a collection of articles from reporting, intelligence, news, and social media sources. Articles accumulate throughout the exercise as moves progress. Each article displays its title, source type, source name, and date posted.
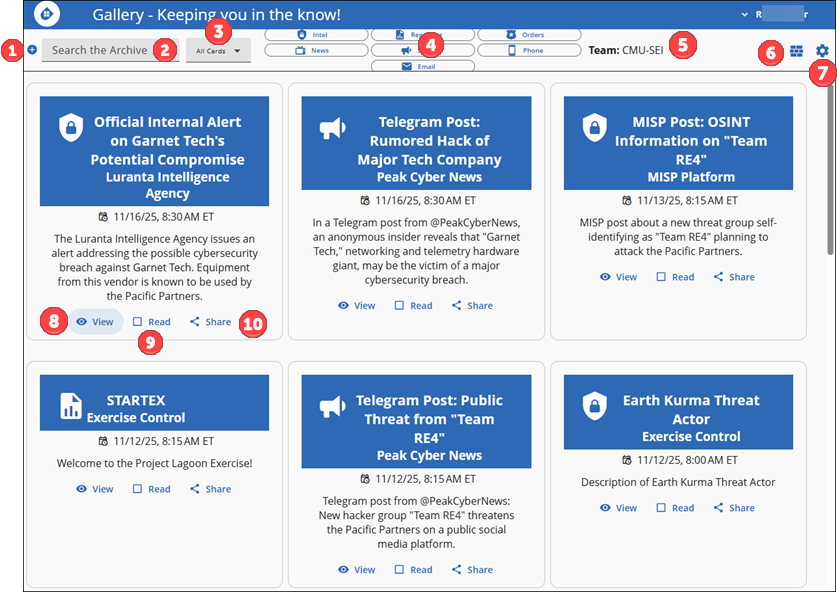
- Add an Article: Click + to add a new article to the Archive. See Add Articles During an Exercise.
- Search the Archive: Enter terms to filter articles by keyword.
- Cards Filter: Filter articles by card category.
- Source Filters: Filter articles by source type (Intel, Reporting, Orders, News, Phone, or Email).
- Team: Displays the currently selected team. Users who are also observers can use this to switch between teams and view other teams' progress.
- Wall and Archive Toggle: Toggles between the Gallery Wall and Gallery Archive.
- Gear: Opens the Administration View. See Administration View.
- View: Opens the full article in a pop-up or new tab.
- Read: Marks the article as read to track new content.
- Share: Shares the article with another team.
Add Articles During an Exercise
Users with the appropriate Content Developer permissions can add articles to the Gallery Archive throughout the course of an exercise event. To add an article:
- On the Gallery Archive, in the top left corner, click + (Add an Article icon) to add an article.
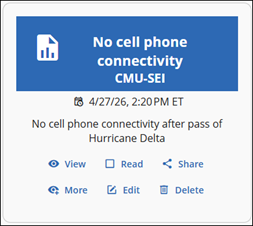
- In Name, enter the article name (for example,
No cell phone connectivity). - In Summary, enter a short summary (for example,
No cell phone connectivity after pass of Hurricane Delta). - In Description, enter the full article content (for example,
Hurricane Delta made landfall as a Category 4 storm, destroying cell towers and disabling backup generators. An estimated 340,000 residents are without mobile service.). - In URL, enter a URL to provide a link to additional information (for example,
https://www.coastnews.com/hurricane-delta-cell-outages). - Select Open URL in new tab to open the URL in a new browser tab.
- In Card, select the card to categorize this article (for example,
Communications Sector). - In Status, select the article's status (for example,
Affected). - Click Save.
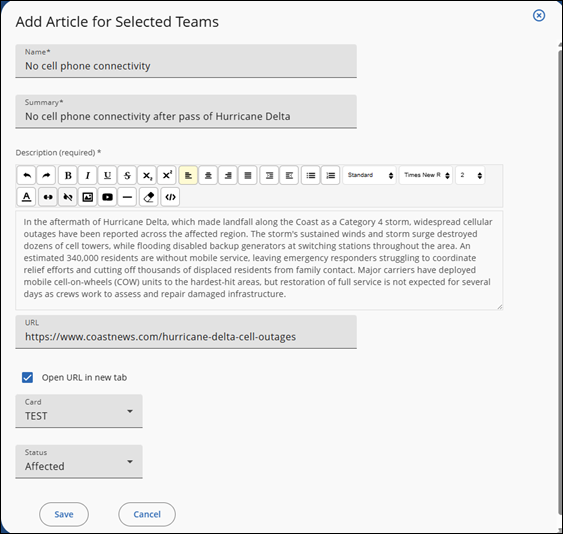
After you create your article, the Gallery Archive displays it like this.
Edit an Article
To edit an article, follow these steps:
- On the Gallery Archive, select the article to edit and click Edit on the article's card. The article opens in the same form used when creating an article.
- After making all necessary edits, click Save.
Delete an Article
To delete an article, follow this step:
- On the Gallery Archive, select the article to delete and click Delete (the trash can icon) on the article's card.
Glossary
This glossary defines key terms and concepts used in the Gallery application.
Article: A piece of writing that typically relates to a particular topic.
Card: Groups articles into their respective categories. Define categories in the administration panel.
Collection: A set of articles.
Content Developer Permission: Grants a user the ability to create collections and exhibits, and view roles and groups.
Email Filter: Information gathered from messages distributed by electronic means.
Exhibit: The scheduled instance of a collection.
Gallery: Web application where participants receive incident information.
Gallery Archive: A collection of relevant information from reporting, intelligence, news, and social media sources.
Gallery Wall: The dashboard that displays "cards" to help participants visualize the incident.
Intel Filter: Information acquired by an intelligence agency.
News Filter: Information acquired by a broadcast or published report of news.
Observer Role: Individuals tasked with impartially and objectively monitoring teams during an exercise.
Orders Filter: Information gathered based on a decision issued by an authoritative order.
Phone Filter: Information gathered from SMS messages and phone calls.
Reporting Filter: Information gathered from a document in an organized and objective way, without analysis or recommendations.
Social Media Filter: Information acquired from multiple users on a social media platform.